As I said it was radical and the only real evolutionary attempts were during the 1940s and lacked impetus and backing, given the war time imperatives. Here it's being introduced to the storyline in the 1930s, and I am quite happy to do a rugby, take the blame and run with it. I was influenced by Gerald Halls "Yesterdays War", which is really more a man back in time story than true AU. But he used the dragonfly concept in a post WW1 Australia. My rationale for working this premise is also to 'give' a notional outstanding aircraft to help trigger the success of the Commonwealth Aircraft Corporation ITTL. IRL, they produced a marginal series of wannabes in design terms which limited their success. Since intrinsic to my AU is the RNN leveraging their naval aviation bias from an early stage, this represents another story thread in getting the Dragonfly, and is part of setting the RAF/RN war tie-in.I am not an aeronautical engineer, though I trained to fly gliders and was competition piloting paragliders for many years so all I would say is that if the Tandem wing was such a panacea why has it always been a developmental dead end. Every aircraft is a balance of compromises perhaps the compromises in other performance factors precludes the Tandem win from being utilised in any combat role at the time of your TL. Also look at highspeed stalling, I am sure that if practical a tandem wing fighter would have been developed OTL.
As to the developing battle, nothing happens in a vacuum even in war. So even if the deception by the IJN, in that they have hoodwinked the Americans by allowing them to decode redundant plans, becomes redundant as soon as contact is made and real time facts take over.
So what happens next is I feel more important that what has happened next. How do the Allies react to what is actually happening and what is now known regarding the enemies forces and locations.
You are using an out of date browser. It may not display this or other websites correctly.
You should upgrade or use an alternative browser.
You should upgrade or use an alternative browser.
An AH Battle: 1st Battle of Midway, 17 - 21 June 1942
- Thread starter Tangles2
- Start date
The attacks from Midway were anything but ineffectual as they keep disrupting the japanese. See Shattered Sword.
Knowing who is where, and with what, is rather fundamental.
2-carrier groups are what can be handled at this point in the war. KB was working as two pairs.
Knowing who is where, and with what, is rather fundamental.
2-carrier groups are what can be handled at this point in the war. KB was working as two pairs.
They kept disrupting a force of only four carriers. Here the KB is eight, also the weighting of Midway as an importance as an objective is lower, so I present a view that the significance of this 'distraction" is of far less importance. The disruption does not affect in any way airfleet 2 and the result to airfleet 1 is in many ways parallel to the IRL impact. But then it represented the totality of the KB IOTL. There isn't the redundancy of force level available that is now here for the IJN. Shattered sword is far more applicable in its IRL impact than in the developing scenario here, so how much weight do we add or subtract with regard to its impact to such a changed structure and its 'disruption?'The attacks from Midway were anything but ineffectual as they keep disrupting the japanese. See Shattered Sword.
Knowing who is where, and with what, is rather fundamental.
2-carrier groups are what can be handled at this point in the war. KB was working as two pairs.
I'm thinking that I've pretty much given a fair where, what and who already if you read the actual dispositions. TF58 is roughly 90 miles NE of Midway, with TF16 & 17 each spaced out a further 40 miles apart in a roughly N-S line. TF 44 is 90 miles ESE of Midway, closing slowly. The 1st airfleet is some 135 miles WNW of Midway heading SE when detected by Halsey, with the 2nd airfleet paralleling it about 25 -40 miles north. Yamamoto is trailing the 1st airfleet by approximately 90miles to the West The 5th airfleet is approximately 220 miles due south of TF44 at dawn, heading due north to fulfill its intended role as a blocking/cutoff force to any identified USN force that either engages the KB or attempts to withdraw. I will sit down with a plotting board and firm up these figures when I come to prepare a map in future to clarify this layout when I edit this work. If specific distances need to be massaged, I will do so. Thanks for your feedback.
The KB was operating as a single four carrier force, each of two 2 carrier divisions. I would contend this is a single force, operating with one screen and an integrated Cap, if poorly managed. Each division was a pair but as part of an integrated overall force. It is no different operationally from the later USN Task group structure. I concur that the realities of tactical control limit operational employment, but that is why here the KB is functionally two airfleets of four decks, each of two divisions ITTL. I would contend to the later US practices Again, if two is what can be handled, and was TF17 operating as a singleton simply because there was no other deck available? I would propose that much of the organizational structure was situational at this stage, driven by availability as much as anything. The IRL levels it was a double with 5CA and a singleton with 2CAs. Given the force increase I again ask what weight Nimitz would give with those reinforcements. He has two 2 carrier groups here of two decks, and I present here that rather he has paired his newer ships with the old to both strengthen the screen and put the newcomers with experienced air groups. You clearly differ, but I question the assumption that it was all they could handle is actually that apt in this situation, sorry. I think it comes down to what command decision of either Nimitz or Halsey would make, and what weight would they put on screen strength dissolution or command appointments. Historically they were there thinking the signal intelligence gave them the edge and there was a distinctly aggressive mindset. Would that impact the weighting of increasing each TF to three decks been a result is dependent on how you perceive the US commanders would read such a situation.
Saratoga just missed the Battle of Midway. In the days after Midway Saratoga was sent north to Alaska to reinforce the fleet in the North Pacific. She would be available for a battle near Midway two weeks later than the OTL battle.Hors-de-combat as the IRL Sara was after the Jan 42 torpedoing. Haven't yet decided if it's just badly damaged as IRL, or sunk yet, can go either way, but I'm leaning on following the IRL precedent. In this case it doesn't figure in the Midway considerations as this was the reality IOTL.
The kind of mass carrier battle you envision is hard to imagine. With no radar, very poor radios, and not much central control over CAP makes a coordinated defense of the fleet very hard to imagine. With widely divided carrier divisions radio traffic would be heavy giving the Allies with their superior Huff-Duff technology an additional advantage.They kept disrupting a force of only four carriers. Here the KB is eight, also the weighting of Midway as an importance as an objective is lower, so I present a view that the significance of this 'distraction" is of far less importance. The disruption does not affect in any way airfleet 2 and the result to airfleet 1 is in many ways parallel to the IRL impact. But then it represented the totality of the KB IOTL. There isn't the redundancy of force level available that is now here for the IJN. Shattered sword is far more applicable in its IRL impact than in the developing scenario here, so how much weight do we add or subtract with regard to its impact to such a changed structure and its 'disruption?'
I'm thinking that I've pretty much given a fair where, what and who already if you read the actual dispositions. TF58 is roughly 90 miles NE of Midway, with TF16 & 17 each spaced out a further 40 miles apart in a roughly N-S line. TF 44 is 90 miles ESE of Midway, closing slowly. The 1st airfleet is some 135 miles WNW of Midway heading SE when detected by Halsey, with the 2nd airfleet paralleling it about 25 -40 miles north. Yamamoto is trailing the 1st airfleet by approximately 90miles to the West The 5th airfleet is approximately 220 miles due south of TF44 at dawn, heading due north to fulfill its intended role as a blocking/cutoff force to any identified USN force that either engages the KB or attempts to withdraw. I will sit down with a plotting board and firm up these figures when I come to prepare a map in future to clarify this layout when I edit this work. If specific distances need to be massaged, I will do so. Thanks for your feedback.
The KB was operating as a single four carrier force, each of two 2 carrier divisions. I would contend this is a single force, operating with one screen and an integrated Cap, if poorly managed. Each division was a pair but as part of an integrated overall force. It is no different operationally from the later USN Task group structure. I concur that the realities of tactical control limit operational employment, but that is why here the KB is functionally two airfleets of four decks, each of two divisions ITTL. I would contend to the later US practices Again, if two is what can be handled, and was TF17 operating as a singleton simply because there was no other deck available? I would propose that much of the organizational structure was situational at this stage, driven by availability as much as anything. The IRL levels it was a double with 5CA and a singleton with 2CAs. Given the force increase I again ask what weight Nimitz would give with those reinforcements. He has two 2 carrier groups here of two decks, and I present here that rather he has paired his newer ships with the old to both strengthen the screen and put the newcomers with experienced air groups. You clearly differ, but I question the assumption that it was all they could handle is actually that apt in this situation, sorry. I think it comes down to what command decision of either Nimitz or Halsey would make, and what weight would they put on screen strength dissolution or command appointments. Historically they were there thinking the signal intelligence gave them the edge and there was a distinctly aggressive mindset. Would that impact the weighting of increasing each TF to three decks been a result is dependent on how you perceive the US commanders would read such a situation.
Were the USN using HF/DF at this time? The RN were struggling to get enough sets built to fulfil their requirements in OTL. ITTL of course this could be different.
7
Part Seven
The Second Wave strikes
Even as the surviving aircraft from the initial strikes were returning the second wave of aircraft were approaching their targets. The first of these to arrive was the 189 strong strike from TF17 on the four carriers of the 2nd Air Fleet, consisting of 38 Wildcats, 78 Dauntlesses, and 83 Devastators. Despite lacking radar, the Japanese force was not surprised due to Admiral Yamaguchi deploying a screen of floatplanes from his cruisers down the threat axis of the American carrier force. These detected the approaching strike some 70 miles out from the Japanese force, enabling the Japanese to have the entire fighter strength of 47 Zeroes deployed at altitude for the approaching strike, which they intercepted still some 15 miles short of the Japanese ships. Again, the US fighter force was lacking the necessary numbers to defend the strike effectively and was again hampered by the poor tactics employed, losing 26 of their number for the loss of 9 Japanese fighters. Nevertheless, the sheer size of the strike swamped the Japanese CAP, though much of the raid cohesion was disrupted, and again the slow Devastators received the brunt of the attention of the Japanese fighters, losing over 50 aircraft whilst pressing home their attack. The 2nd Carrier Division consisting of the carriers Hiryu and Soryu were to receive the brunt of this attack, being the closest to the axis of the attack. Admiral Yamaguchi had deployed the two battleships in support of his force on this axis and both Haruna and Kirishima had orders to remain close to the carriers to defend them. Their defensive fire combined with the again defective performance of the US torpedoes largely wasted the bravery of the torpedo bombers with several hits failing to detonate, with only two hits on the Soryu detonating and a single hit on the Haruna. The hit on the Haruna was shrugged off by its armor, but the damage to the Soryu was more serious, destroying one engine room and rapidly slowing her. The majority of the Dauntless dive bombers again targeted the 2nd carrier division, with less than 20 attempting to engage Carrier Division 5. those that did attempt to engage the Shokaku and Zuikaku had been badly disrupted by the fighter screen and only achieved several near misses. The balance of the dive-bombers, approximately 45, proceeded to concentrate on the Hiryu and Soryu. The rapidly slowing Soryu proved to be an easy target and was hit no less than six times and despite the absence of aircraft onboard, reduced to a flaming wreck that would subsequently sink some four hours later. The Hiryu was hit three times, and despite serious fires aboard, was able to maintain power and maneuverability, but the surviving strike aircraft would report both as being in a sinking condition. But this was achieved at great cost with well over half of the strike aircraft failing to return. With both the 1st and 2nd Air Fleets now down a carrier, Yamaguchi now assumed command of both elements of the Kido Butai as the two groups moved to consolidate as a single force.
As this was occurring the strike force of 113 aircraft from Kaga and Akagi was reaching TF17. As with the first strike on TF16, this group was also composed of the cream of the Kido Butai, experienced veterans of Pearl Harbor, and the battles of the opening phase of the Pacific campaign. However, unlike that strike, they lacked the numbers to simply swamp the US defenses to the degree of the first strike. Secondly, the defending Wildcats, most notably those of VF6 off the Hornet, employed superior tactics and avoided melee turning fights, and were able to inflict roughly equal casualties on the escorting Zeros. Nevertheless, with roughly equal numbers (39 Zeroes to 35 Wildcats) the fighter groups effectively neutralized each other, both losing approximately half their numbers in the exchange, whilst downing only a few of the attacking aircraft. The majority of the strike aircraft concentrated on two carriers, Yorktown and Wasp the Wasp had been designed under the WNT restrictions. To meet these limitations in the available tonnage she had almost no armor and a lower top speed. Like the Ranger in TF16, it proved vulnerable to the three torpedoes and three bomb hits the Japanese strike inflicted upon her. Despite retaining power, the resulting fires and flooding from these hits proved impossible to contain. Her captain would order the ship abandoned shortly after 4 pm that afternoon and the Wasp would still be burning when she sank later that evening taking over 300 of her crew down with her. Yorktown also was badly damaged by the strike, being torpedoed twice and receiving four bomb hits, one of which struck the bridge structure killing Admiral Fletcher. Retaining power and maneuverability she was left reduced to only moving at a few knots. With a destroyed flight deck and her stern quarter fiercely ablaze her ability to operate aircraft was gone even if not in immediate danger of sinking. The final carrier of the group Hornet benefited from the proximity of the anti-aircraft cruiser San Juan and only being attacked by a small number of Val’s. She survived with only a single bomb hit striking her port after 5-inch mounts, destroying them and causing slight damage to the flight deck. As the surviving Japanese aircraft withdrew the screen commander, Admiral Kincaid assumed command of the Task Force leaving the US forces with only two carriers remaining afloat of the original six, Hornet and Yorktown, and only the Hornet capable of operating and recovering aircraft.
The final strike of the initial exchanges was of 154 aircraft from TF58, consisting of 44 fighters, 59 TBR (48 Sea-Battles and 11 of the new more powerful Spearfish), and 52 Cormorant DBR on the three remaining carriers of the 1st Air Fleet. Not released by Halsey till after 1000hrs and having the furthest to travel it did not arrive till after noon. This strike had the misfortune of being detected some 60 miles out by search aircraft earlier dispatched to confirm the location and composition of the reported force, enabling the entire Japanese CAP 62 Zeros to be airborne to engage the incoming strike. Despite being outnumbered the 44 escorting Dragonflies more than held their own downing 26 of the defending fighters for the loss of 19 of their own. Nevertheless, with so many defenders nearly a dozen of the Zeros were able to break through to engage the strike, with roughly equal numbers engaging each group. Insufficient to break the groups up, they nevertheless managed to disrupt the attacking groups. These were further disrupted by another 18 Zeroes arriving in dribs and drabs during the melee as Yamaguchi redirected some of the returning strike escorts from the closing 2nd Air Fleet, now less than 20 miles distant. The resultant disorganized melee prevented any cohesive single attack from forming. This led to several small groups attacking all three remaining aircraft carriers, with the two largest carriers Kaga and Akagi bearing the brunt of the attention. The presence of the two battleships with their large AA array and orders to protect the carriers again played a major role in the survival of the Akagi and Junyo, both near one of battleships. The smaller carrier Junyo attracted the least attention during the strike and emerged surprisingly unscathed, whilst the Akagi was to receive an additional two torpedoes and two bomb hits. Despite this, she remained underway and subsequently extinguished her fires and would eventually successfully return to Japan thanks to the heroic efforts of her crew. Unable to operate aircraft she would take no further part in the battle and would not return to operational duties until the second half of 1943. The remaining carrier Kaga would prove less fortunate. Already with underwater damage from the TF16 strike earlier, she would receive four further torpedo hits and two bomb hits. This damage was too extensive and the flooding was impossible to contain. Afire and rapidly listing to starboard she would sink less than two hours later, taking over 600 of her crew with her. During the strike, the Hiei received one additional torpedo on top of that from the first strike, and Kirishima two, as well as a single bomb, hit each. Though damaged and forced to reduce speed both had sufficient armor to survive and remain in support of the carriers. To achieve this cost the air groups of TF58 69 aircraft, largely due to the ability of the fighter escort to counter the highly maneuverable Zero. As the strike departed, they left the 1st Air fleet with only a single operational carrier, the remarkably undamaged Junyo, scrambling to recover the remaining aircraft aloft. Being the smallest carrier of the Kido Butai, she was forced to ditch many of the damaged aircraft over the side whilst crowding as many aircraft aboard as possible. With the 2nd Airfleet closing, many were directed to land there, but nearly 20 planes were forced to ditch by screen elements as they ran out of fuel.
By early afternoon the surviving units of the 1st and 2nd fleets had closed and consolidated as a single force, with Admiral Yamaguchi now in command. He was faced with a force that had lost three of the eight carriers present that morning, with two further damaged carriers afloat but unable to operate aircraft, and two of his four battleships also significantly damaged. His remaining three operational decks, Shokaku, Zuikaku, and Junyo, were packed and had about 220 operational aircraft available. Even as he organized this force, confident that he had badly damaged the US carrier groups he was being updated on the information from Ozawa’s 5th Air fleet about a further carrier force to the south and the result of that engagement. As he organized his remaining air groups for a strike on the now located TF58 he contacted Yamamoto and urged him to close and consolidate their forces, whilst he committed a further strike on the as yet unengaged TF58.
Last edited:
The main reason why the American Carrier groups operated in pairs or alone was the difficulty of controling the resultant force. This is also why even the Japanese used the size of attacking wave they did. it was the inability of controling the force.
Radar made the job easier but marshaling large numbers of aircraft from different carriers was and still is difficult. In fact even with modern systems the ability to control air attacks and defence reduces as more units are added. For example the USN in the cold war planned to have 4 CVBG in order to go north of Iceland.
This was only possible thanks to the E-2 and even in other operations like desert Storm required numerous AWACS and carefully deconflicted attack paths.
Thinking of the OP's canard fighter reminded me of this late war project by Bolton and Paul, the P100. ITTL perhaps a merlin engine naval fighter designed by Miles/Bolton & Paul is built instead of the Defiant. This could post war lead to this intersting piece of kit.

This the OTL BAe SABA (Small Agile Battlefield Aircraft), though in this TL it would be the SACA (Small Agile Carrier Aircraft)
I an not sure how agile the B&P 100 type would be but it does give some Idea what a progression from the Miles might have looked like.
I hope this helps as it shows that the Lubella was not a complete dead end and the OP is not so far into ASB territory when suggesting in their TL the RN might have had a very manoeuvrable canard/twin wing fighter. in 1941.
Remember canard and tandems are two different, if closely related, fields of aeronautics. Tandems relate as early as the 1907 Bleriot B3 and Langley's early flights in 1914, with the wings being balanced lifting bodies at both ends of the airframe. Canards while lifting surfaces are primarily intended to enhance maneuverability and performance and not purely lifting bodies. Technically you could describe the fore planes of the Wrights earliest aircraft as canards almost, as they wer more meant to provide control.The earliest tandems were envisioned in the role to provide lift, which is reflected in the early employment experiments including those of Miles, and this shaped much of the initial perception of their use. Recognition of the canards improved performance aspect for normal aircraft came later.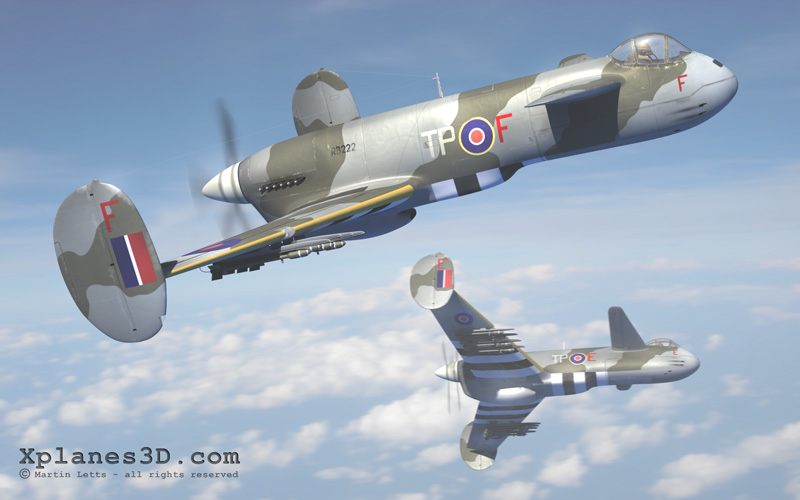
Thinking of the OP's canard fighter reminded me of this late war project by Bolton and Paul, the P100. ITTL perhaps a merlin engine naval fighter designed by Miles/Bolton & Paul is built instead of the Defiant. This could post war lead to this intersting piece of kit.
This the OTL BAe SABA (Small Agile Battlefield Aircraft), though in this TL it would be the SACA (Small Agile Carrier Aircraft)
I an not sure how agile the B&P 100 type would be but it does give some Idea what a progression from the Miles might have looked like.
I hope this helps as it shows that the Lubella was not a complete dead end and the OP is not so far into ASB territory when suggesting in their TL the RN might have had a very manoeuvrable canard/twin wing fighter. in 1941.
Last edited:
ITTL he is in the text on Hornet as CO of VF6. It is one of the reasons Hornet survives as his squadron employs his new tactics, avoiding turning fights and is more effective in its CAP role. later to be the weave. In the opening stages of the Pacific campaign this was a reason for higher F4f losses till familiarity with the Zero and its strengths and weaknesses grew.The F4F Wildcat losses are very high. Was the Thach Weave not developed ITTL?
Trying to work out why Lyster sacrificed his air groups, rather than wait a few hours and brutalise any located Japanese carriers safely. Just to make Halsey happy. Halsey isnt his boss. Oh, right, reasons 
The threshold between tandem wings and canards gets very blurred once you vary from the almost equal wing area of a true tandem wing design which the Miles M35 could be said to have to the Much greater variance in wing area exhibited by the later M39B which is closer to what would be expected in early canard aircraft.
https://www.aerosociety.com/media/4...la-tandem-wing-aircraft-concept-1941-1947.pdf
This paper give s a very thorough overview of the Miles Tandem wing works and does fortuitously include an illustration of the proposed Naval fighter that was later embodied in the M43 response to the F6/42 specification. It is worth noting that the M42 response to this same specification was wind tunnel tested with a forward wing of only 12% of the aft wing which is well within canard ratios.
So I would suggest that the best analogue for your proposed fighter sis as per the concept illustration below based on the M35 design.
 This picture is included in the above paper and is much clearer there.
So as not to derail your excellent story anymore than I have done so far, please PM me if you wish to continue this particular discussion.
https://www.aerosociety.com/media/4...la-tandem-wing-aircraft-concept-1941-1947.pdf
This paper give s a very thorough overview of the Miles Tandem wing works and does fortuitously include an illustration of the proposed Naval fighter that was later embodied in the M43 response to the F6/42 specification. It is worth noting that the M42 response to this same specification was wind tunnel tested with a forward wing of only 12% of the aft wing which is well within canard ratios.
So I would suggest that the best analogue for your proposed fighter sis as per the concept illustration below based on the M35 design.
So as not to derail your excellent story anymore than I have done so far, please PM me if you wish to continue this particular discussion.
I'd question how it would damage the interservice relationship if he tried to delay any attack whilst his own allies and getting heavily engaged, particularly when command rests with the USN. Sommerville had given authority to Nimitz, then down to Halsey. The indication was to give Lyster to freedom to employ a night strike capability, if possible, but do you think any USN flag officer would appreciate him demurring and implying "Oh but we can do so much better if we do it tonight, Lets defer attacking till then." The wording had been 'Nimitz has agreed that Lyster will have as free a hand as possible over the use of his ships, particularly if the RN carriers can get off a night strike. Question is how applicable is "free as possible" and does this potential night strike capability apply if it's going to mean a delay of half a day and possible loss and destruction of allied ships. Historically there are countless examples where involvement in battle has been less than optimal, and if the IJN had already located them then there exists the possibility of remaining unengaged is taken out of his hands.Trying to work out why Lyster sacrificed his air groups, rather than wait a few hours and brutalise any located Japanese carriers safely. Just to make Halsey happy. Halsey isnt his boss. Oh, right, reasons
Actually that is it, and the analog is that I am trying to incorporate it from 1930s start point. Still dope winged and biplanes and the entire monoplane, radios, oxygen etc. revolution is just triggering. That one pic was the first flying prototype just to be a demo that many aircraft differed ITTL> I've got to the Mk II by 1939 and the Shinden pic is an indication of the eventual aiming point, though with a forewing rather than canard to make it a tandem.The threshold between tandem wings and canards gets very blurred once you vary from the almost equal wing area of a true tandem wing design which the Miles M35 could be said to have to the Much greater variance in wing area exhibited by the later M39B which is closer to what would be expected in early canard aircraft.
https://www.aerosociety.com/media/4...la-tandem-wing-aircraft-concept-1941-1947.pdf
This paper give s a very thorough overview of the Miles Tandem wing works and does fortuitously include an illustration of the proposed Naval fighter that was later embodied in the M43 response to the F6/42 specification. It is worth noting that the M42 response to this same specification was wind tunnel tested with a forward wing of only 12% of the aft wing which is well within canard ratios.
So I would suggest that the best analogue for your proposed fighter sis as per the concept illustration below based on the M35 design.
View attachment 903265 This picture is included in the above paper and is much clearer there.
So as not to derail your excellent story anymore than I have done so far, please PM me if you wish to continue this particular discussion.
The sheer mind rending fury of Admiral King would probably cause a singularity if the Royal Navy was present at this Midway and they said "nah we'll wait till night time" if the USN was getting slaughtered like this.I'd question how it would damage the interservice relationship if he tried to delay any attack whilst his own allies and getting heavily engaged, particularly when command rests with the USN. Sommerville had given authority to Nimitz, then down to Halsey. The indication was to give Lyster to freedom to employ a night strike capability, if possible, but do you think any USN flag officer would appreciate him demurring and implying "Oh but we can do so much better if we do it tonight, Lets defer attacking till then." The wording had been 'Nimitz has agreed that Lyster will have as free a hand as possible over the use of his ships, particularly if the RN carriers can get off a night strike. Question is how applicable is "free as possible" and does this potential night strike capability apply if it's going to mean a delay of half a day and possible loss and destruction of allied ships. Historically there are countless examples where involvement in battle has been less than optimal, and if the IJN had already located them then there exists the possibility of remaining unengaged is taken out of his hands.
Especially as theres no guarantee a night strike would find the targets or be effective enough to justify letting the USN die for it
And it would hardly be the first time Britain had to throw itself into a inopportune battle to try and help its ally - cough Somme cough
Last edited:
Giving Halsey authority over Lyster simply makes no sense. Halsey is a TF commander with dubious intel. As free as possible means exactly that, not 'throw away your airgroups because a TF commander wants you to'. Lysters orders would be to destroy the IJN carriers, not throw a figleaf to the AmericansI'd question how it would damage the interservice relationship if he tried to delay any attack whilst his own allies and getting heavily engaged, particularly when command rests with the USN. Sommerville had given authority to Nimitz, then down to Halsey. The indication was to give Lyster to freedom to employ a night strike capability, if possible, but do you think any USN flag officer would appreciate him demurring and implying "Oh but we can do so much better if we do it tonight, Lets defer attacking till then." The wording had been 'Nimitz has agreed that Lyster will have as free a hand as possible over the use of his ships, particularly if the RN carriers can get off a night strike. Question is how applicable is "free as possible" and does this potential night strike capability apply if it's going to mean a delay of half a day and possible loss and destruction of allied ships. Historically there are countless examples where involvement in battle has been less than optimal, and if the IJN had already located them then there exists the possibility of remaining unengaged is taken out of his hands.
I agree that there is the danger of too much cross talk distracting from a narrative timeline. But as a reader I also learn so much from these esoteric side conversations. May I suggest starting a new discussion thread rather than a PM conversation?.
View attachment 903265 This picture is included in the above paper and is much clearer there.
So as not to derail your excellent story anymore than I have done so far, please PM me if you wish to continue this particular discussion.
The 'fighter direction' of the Japanese fleet a Midway was for the warships to fire their main armament in the direction of any approaching aircraft and hope that the fighters on CAP reacted to it.The kind of mass carrier battle you envision is hard to imagine. With no radar, very poor radios, and not much central control over CAP makes a coordinated defense of the fleet very hard to imagine. With widely divided carrier divisions radio traffic would be heavy giving the Allies with their superior Huff-Duff technology an additional advantage.
Given there was no centralised fighter command and the fleet fighters carrying no radios this meant that the IJN CAPs reaction to an approaching enemy was totally uncoordinated and at times during the Midway battle counter productive as it drew away the fighter cover allowing subsequent attacking groups of aircraft a free reign.
Share: